<p>There are two things you should know about this post before you read it:</p>
<ol>
<li>I should have posted this back in October when I made these for Halloween.</li>
<li>This is going to be long!</li>
</ol>
<p>I came across this recipe on a really cool website called <a href="http://jelly-shot-test-kitchen.blogspot.com/2010/10/candy-corn-jello-non-alcoholic.html">Jelly Shot Test Kitchen</a>. And I was really excited to find out that they are based in Minnesota! I knew I had to make these for an event with some friends and these were a huge hit. I should tell you that these aren&#8217;t hard to make, but they are tedious and a bit time consuming. But definitely worth it in the end! You&#8217;ll look like a kitchen diva when you make these!</p>
<p>Here&#8217;s what you&#8217;ll need:</p>
<ul>
<li>Jello &#8211; I used orange flavored for this one</li>
<li>Gelatine</li>
<li>Carnation condensed milk</li>
<li>Food coloring</li>
<li>Cooking spray</li>
<li>Ice cube trays or mini cupcake pan or another type of mold shape you want to use</li>
</ul>
<p><img decoding="async" src="http://andihays.net/wordpress//HLIC/2d0e3826bee684b5fee32ceaf1e3549c.jpg"></p>
<p>I&#8217;m going to give you some general instructions. But for all the measurements and more detailed instructions, you should refer to the link above. They are the experts! </p>
<hr>
<p>First, spray your mold with cooking spray and then wipe out the excess.</p>
<p>Now, you add some water to a pan and then add the gelatine to it until it dissolves a bit. Then heat on low until it completely dissolves, stirring the whole time.</p>
<p><img decoding="async" src="http://andihays.net/wordpress//HLIC/5f230ecb8751c506ba8472ef6d4f9288.jpg"></p>
<p><img decoding="async" src="http://andihays.net/wordpress//HLIC/9d4886a5d8135457353b3e4ec429cefd.jpg"></p>
<p><img decoding="async" src="http://andihays.net/wordpress//HLIC/77296cdca3f83bfaddabd63ccc39dfcb.jpg"></p>
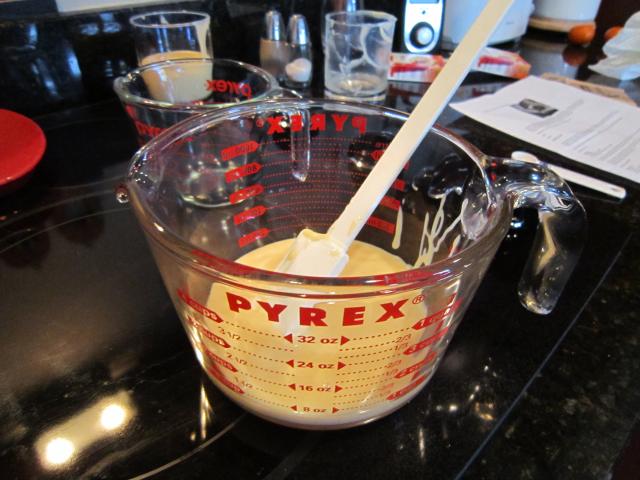
<p>Meanwhile, add the condensed milk to a microwave safe container (you may need this later on).</p>
<p><img decoding="async" src="http://andihays.net/wordpress//HLIC/f01a7dd1fb40d765851578871029fae1.jpg"></p>
<p><img decoding="async" src="http://andihays.net/wordpress//HLIC/ea6d704185c7c69099dbba23725f2a52.jpg"></p>
<p>After the gelatine is dissolved, add it to the condensed milk and stir until it is all combined. </p>
<p><img decoding="async" src="http://andihays.net/wordpress//HLIC/3bd4d2491c74e09138d161d7c78cd015.jpg"></p>
<p><img decoding="async" src="http://andihays.net/wordpress//HLIC/94b40e72e00d82fa2999414d7606d4dd.jpg"></p>
<p>Now scoop a tiny bit into the molds.</p>
<p><img decoding="async" src="http://andihays.net/wordpress//HLIC/9a7856f1c80aa098416d8aa565bd57e3.jpg"></p>
<p><img decoding="async" src="http://andihays.net/wordpress//HLIC/35cc79c01046efb8808a33eccfedc622.jpg"></p>
<p><img decoding="async" style="display: block; float: none; margin-left: auto; margin-right: auto" src="http://andihays.net/wordpress//HLIC/b1d3472bee9e23d4160412977f43f318.jpg"></p>
<p>Then you stick your molds in the fridge to solidify while you are working on the next layer.</p>
<p>Now you want to cover the container with the condensed milk in it. We used tin foil over the top, then wrapped it in a couple dish towels. We really didn&#8217;t want it to solidify. If it does, that is when the microwave bowl comes in handy because you&#8217;ll need to slowly heat it up so it is easier to pour and stir for the final layer. </p>
<p><img decoding="async" src="http://andihays.net/wordpress//HLIC/bd9a78f139cc7957e18772e418fcb2e0.jpg"></p>
<p><img decoding="async" src="http://andihays.net/wordpress//HLIC/17d8511ebc4b25da6f431c5a54439f69.jpg"></p>
<p>Now you make the orange jello layer. You&#8217;ll use jello, water and gelatin. This is done similarly to the way you did the water and gelatin….just follow the directions on the link I gave you above. <img decoding="async" style="border-bottom-style: none; border-right-style: none; border-top-style: none; border-left-style: none" class="wlEmoticon wlEmoticon-smile" alt="Smile" src="http://andihays.net/wordpress/wp-content/uploads/2011/02/wlEmoticon-smile3.png">&nbsp;</p>
<p><img decoding="async" src="http://andihays.net/wordpress//HLIC/559bbed80d6406167d940259f62851b2.jpg"></p>
<p><img decoding="async" src="http://andihays.net/wordpress//HLIC/4b1d3204edb136ea00b6711dfbdd5a70.jpg"></p>
<p>Then fill the molds with the orange jello. </p>
<p><img decoding="async" src="http://andihays.net/wordpress//HLIC/5ede47a2689d1f138e27caa3615d42e5.jpg"></p>
<p><img decoding="async" src="http://andihays.net/wordpress//HLIC/bc5efd7bcdc7409c05e6111fc800dcb3.jpg"></p>
<p><img decoding="async" src="http://andihays.net/wordpress//HLIC/b02f030b9e5124f6d5292f032b5ff73a.jpg"></p>
<p><img decoding="async" src="http://andihays.net/wordpress//HLIC/1d3c0f400487da3bdc14b815a92d6f8a.jpg"></p>
<p>One thing I learned while doing this was don&#8217;t go back and try to add more orange to the molds.&nbsp; If you do, then it tends to melt the white layer too much and then the layers mix a bit. See:</p>
<p><img decoding="async" src="http://andihays.net/wordpress//HLIC/06de7a6b2fb3d7d5a478b2af3e9bc844.jpg"></p>
<p>Now stick the molds back into the fridge to harden. </p>
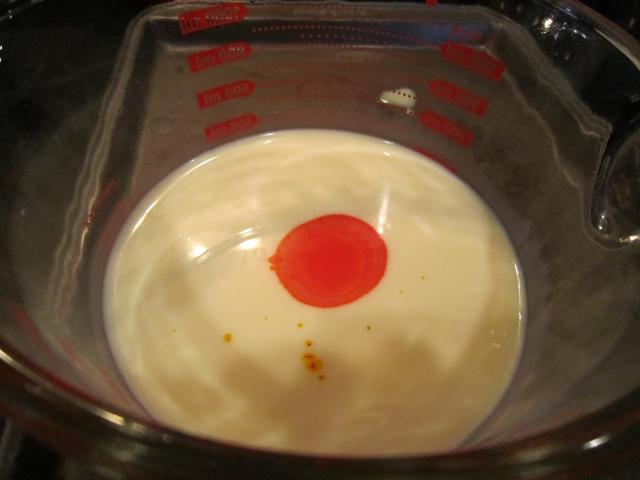
<p>After they have been hardening for a while in the fridge, you&#8217;ll want to unwrap the condensed milk you set aside and add food coloring to it so it can be your final layer!</p>
<p><img decoding="async" src="http://andihays.net/wordpress//HLIC/98f7bbada6237ff35968fd5ba94f0497.jpg"></p>
<p><img decoding="async" src="http://andihays.net/wordpress//HLIC/5b50b66f82b52b4741915cf8dabff4e6.jpg"></p>
<p>Now, spoon the colored condensed milk into the molds.</p>
<p><img decoding="async" src="http://andihays.net/wordpress//HLIC/1c8198ada5de87d3f58dfcbf762e8525.jpg"></p>
<p><img decoding="async" src="http://andihays.net/wordpress//HLIC/79f0be08735d0bd8f9a85b2c13b3b4b1.jpg"></p>
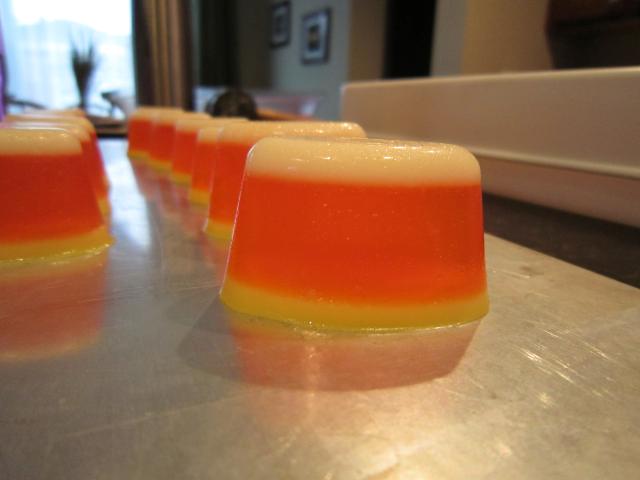
<p>Here&#8217;s a picture where you can see all of the layers.</p>
<p><img decoding="async" src="http://andihays.net/wordpress//HLIC/05b1bbb00cc190c459228857ecd4044d.jpg"></p>
<p>Now you put the molds back into the fridge to, you guessed it, harden. </p>
<p>After they are good and solid, you&#8217;re ready to take them out of their molds. They should slide out fairly easily since you put the cooking spray into the molds to help with the sticking. I ended up using my fingers a bit to get them out. But they came out without too much effort. The ones in the ice cube trays were a little harder to get out because it was a smaller space.</p>
<p><img decoding="async" src="http://andihays.net/wordpress//HLIC/bb399db2499ccddc0aa46e6d2daaf478.jpg"></p>
<p><img decoding="async" src="http://andihays.net/wordpress//HLIC/74a40ac271fbbf6aacdc080978543f88.jpg"></p>
<p><img decoding="async" src="http://andihays.net/wordpress//HLIC/c290b1fdfd9d570c269708cbefbd5444.jpg"></p>
<p><img decoding="async" src="http://andihays.net/wordpress//HLIC/c4a68eede850527c13b17a0fde358c4c.jpg"></p>
<p><img decoding="async" src="http://andihays.net/wordpress//HLIC/acbf41cf3e8a8ed46ecfe8e2a90675a2.jpg"></p>
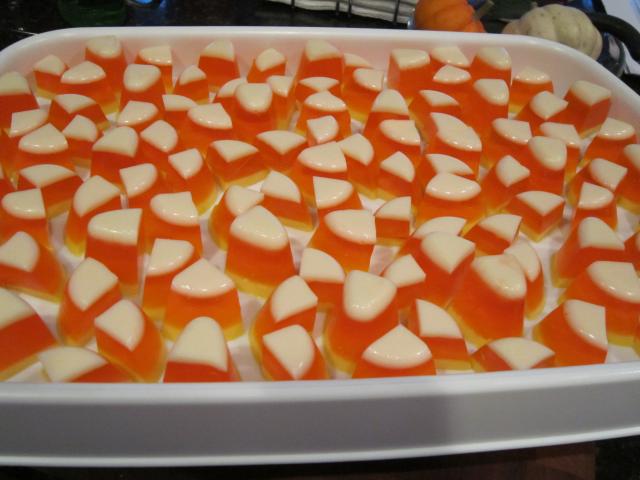
<p>I decided to cut the tall, skinny ones in half to make them easier to eat, and I cut the ones from the cupcake pan into quarters for the same reason. Then I added them to a try (with a lid for easier portability). </p>
<p><img decoding="async" src="http://andihays.net/wordpress//HLIC/0d70250cc2511ad78b75fd1ffa4e939b.jpg"></p>
<p>Pretty cool, huh? They look like candy corn! </p>
<p>Now, because I loved this idea so much, I made them for my shower back in November. I did them in green, pink and blue which were the colors my friends told me were the shower colors. I think they turned out pretty cute! I used strawberry jello for these. </p>
<p><img decoding="async" src="http://andihays.net/wordpress//HLIC/a9e46c44bf835f12726a264528af7e79.jpg"></p>
<p>So there&#8217;s proof you can do them in any color you want. All I did differently, was make sure I put the condensed milk in two containers after mixing in the gelatine so I could color one blue and one green. </p>
<p>I hope you make some of these. They&#8217;ll be a big hit for a kids party or a gathering. And if you do make some, please send me pictures! I would love to see what you made!</p>
<p><img decoding="async" src="http://andihays.net/drupal/files/images/Andi_2_0.png"></p>
{"id":1449,"date":"2011-02-10T08:46:00","date_gmt":"2011-02-10T14:46:00","guid":{"rendered":"http:\/\/andihays.net\/wordpress\/2011\/02\/10\/jello-candy-corn\/"},"modified":"2011-02-10T08:46:00","modified_gmt":"2011-02-10T14:46:00","slug":"jello-candy-corn","status":"publish","type":"post","link":"http:\/\/andihays.net\/wordpress\/2011\/02\/10\/jello-candy-corn\/","title":{"rendered":"Jello Candy Corn"},"content":{"rendered":"<p>There are two things you should know about this post before you read it:<\/p>\n<ol>\n<li>I should have posted this back in October when I made these for Halloween.<\/li>\n<li>This is going to be long!<\/li>\n<\/ol>\n<p>I came across this recipe on a really cool website called <a href=\"http:\/\/jelly-shot-test-kitchen.blogspot.com\/2010\/10\/candy-corn-jello-non-alcoholic.html\">Jelly Shot Test Kitchen<\/a>. And I was really excited to find out that they are based in Minnesota! I knew I had to make these for an event with some friends and these were a huge hit. I should tell you that these aren&#8217;t hard to make, but they are tedious and a bit time consuming. But definitely worth it in the end! You&#8217;ll look like a kitchen diva when you make these!<\/p>\n<p>Here&#8217;s what you&#8217;ll need:<\/p>\n<ul>\n<li>Jello &#8211; I used orange flavored for this one<\/li>\n<li>Gelatine<\/li>\n<li>Carnation condensed milk<\/li>\n<li>Food coloring<\/li>\n<li>Cooking spray<\/li>\n<li>Ice cube trays or mini cupcake pan or another type of mold shape you want to use<\/li>\n<\/ul>\n<p><img decoding=\"async\" src=\"http:\/\/andihays.net\/wordpress\/\/HLIC\/2d0e3826bee684b5fee32ceaf1e3549c.jpg\"><\/p>\n<p>I&#8217;m going to give you some general instructions. But for all the measurements and more detailed instructions, you should refer to the link above. They are the experts! <\/p>\n<hr>\n<p>First, spray your mold with cooking spray and then wipe out the excess.<\/p>\n<p>Now, you add some water to a pan and then add the gelatine to it until it dissolves a bit. Then heat on low until it completely dissolves, stirring the whole time.<\/p>\n<p><img decoding=\"async\" src=\"http:\/\/andihays.net\/wordpress\/\/HLIC\/5f230ecb8751c506ba8472ef6d4f9288.jpg\"><\/p>\n<p><img decoding=\"async\" src=\"http:\/\/andihays.net\/wordpress\/\/HLIC\/9d4886a5d8135457353b3e4ec429cefd.jpg\"><\/p>\n<p><img decoding=\"async\" src=\"http:\/\/andihays.net\/wordpress\/\/HLIC\/77296cdca3f83bfaddabd63ccc39dfcb.jpg\"><\/p>\n<p>Meanwhile, add the condensed milk to a microwave safe container (you may need this later on).<\/p>\n<p><img decoding=\"async\" src=\"http:\/\/andihays.net\/wordpress\/\/HLIC\/f01a7dd1fb40d765851578871029fae1.jpg\"><\/p>\n<p><img decoding=\"async\" src=\"http:\/\/andihays.net\/wordpress\/\/HLIC\/ea6d704185c7c69099dbba23725f2a52.jpg\"><\/p>\n<p>After the gelatine is dissolved, add it to the condensed milk and stir until it is all combined. <\/p>\n<p><img decoding=\"async\" src=\"http:\/\/andihays.net\/wordpress\/\/HLIC\/3bd4d2491c74e09138d161d7c78cd015.jpg\"><\/p>\n<p><img decoding=\"async\" src=\"http:\/\/andihays.net\/wordpress\/\/HLIC\/94b40e72e00d82fa2999414d7606d4dd.jpg\"><\/p>\n<p>Now scoop a tiny bit into the molds.<\/p>\n<p><img decoding=\"async\" src=\"http:\/\/andihays.net\/wordpress\/\/HLIC\/9a7856f1c80aa098416d8aa565bd57e3.jpg\"><\/p>\n<p><img decoding=\"async\" src=\"http:\/\/andihays.net\/wordpress\/\/HLIC\/35cc79c01046efb8808a33eccfedc622.jpg\"><\/p>\n<p><img decoding=\"async\" style=\"display: block; float: none; margin-left: auto; margin-right: auto\" src=\"http:\/\/andihays.net\/wordpress\/\/HLIC\/b1d3472bee9e23d4160412977f43f318.jpg\"><\/p>\n<p>Then you stick your molds in the fridge to solidify while you are working on the next layer.<\/p>\n<p>Now you want to cover the container with the condensed milk in it. We used tin foil over the top, then wrapped it in a couple dish towels. We really didn&#8217;t want it to solidify. If it does, that is when the microwave bowl comes in handy because you&#8217;ll need to slowly heat it up so it is easier to pour and stir for the final layer. <\/p>\n<p><img decoding=\"async\" src=\"http:\/\/andihays.net\/wordpress\/\/HLIC\/bd9a78f139cc7957e18772e418fcb2e0.jpg\"><\/p>\n<p><img decoding=\"async\" src=\"http:\/\/andihays.net\/wordpress\/\/HLIC\/17d8511ebc4b25da6f431c5a54439f69.jpg\"><\/p>\n<p>Now you make the orange jello layer. You&#8217;ll use jello, water and gelatin. This is done similarly to the way you did the water and gelatin\u2026.just follow the directions on the link I gave you above. <img decoding=\"async\" style=\"border-bottom-style: none; border-right-style: none; border-top-style: none; border-left-style: none\" class=\"wlEmoticon wlEmoticon-smile\" alt=\"Smile\" src=\"http:\/\/andihays.net\/wordpress\/wp-content\/uploads\/2011\/02\/wlEmoticon-smile3.png\">&nbsp;<\/p>\n<p><img decoding=\"async\" src=\"http:\/\/andihays.net\/wordpress\/\/HLIC\/559bbed80d6406167d940259f62851b2.jpg\"><\/p>\n<p><img decoding=\"async\" src=\"http:\/\/andihays.net\/wordpress\/\/HLIC\/4b1d3204edb136ea00b6711dfbdd5a70.jpg\"><\/p>\n<p>Then fill the molds with the orange jello. <\/p>\n<p><img decoding=\"async\" src=\"http:\/\/andihays.net\/wordpress\/\/HLIC\/5ede47a2689d1f138e27caa3615d42e5.jpg\"><\/p>\n<p><img decoding=\"async\" src=\"http:\/\/andihays.net\/wordpress\/\/HLIC\/bc5efd7bcdc7409c05e6111fc800dcb3.jpg\"><\/p>\n<p><img decoding=\"async\" src=\"http:\/\/andihays.net\/wordpress\/\/HLIC\/b02f030b9e5124f6d5292f032b5ff73a.jpg\"><\/p>\n<p><img decoding=\"async\" src=\"http:\/\/andihays.net\/wordpress\/\/HLIC\/1d3c0f400487da3bdc14b815a92d6f8a.jpg\"><\/p>\n<p>One thing I learned while doing this was don&#8217;t go back and try to add more orange to the molds.&nbsp; If you do, then it tends to melt the white layer too much and then the layers mix a bit. See:<\/p>\n<p><img decoding=\"async\" src=\"http:\/\/andihays.net\/wordpress\/\/HLIC\/06de7a6b2fb3d7d5a478b2af3e9bc844.jpg\"><\/p>\n<p>Now stick the molds back into the fridge to harden. <\/p>\n<p>After they have been hardening for a while in the fridge, you&#8217;ll want to unwrap the condensed milk you set aside and add food coloring to it so it can be your final layer!<\/p>\n<p><img decoding=\"async\" src=\"http:\/\/andihays.net\/wordpress\/\/HLIC\/98f7bbada6237ff35968fd5ba94f0497.jpg\"><\/p>\n<p><img decoding=\"async\" src=\"http:\/\/andihays.net\/wordpress\/\/HLIC\/5b50b66f82b52b4741915cf8dabff4e6.jpg\"><\/p>\n<p>Now, spoon the colored condensed milk into the molds.<\/p>\n<p><img decoding=\"async\" src=\"http:\/\/andihays.net\/wordpress\/\/HLIC\/1c8198ada5de87d3f58dfcbf762e8525.jpg\"><\/p>\n<p><img decoding=\"async\" src=\"http:\/\/andihays.net\/wordpress\/\/HLIC\/79f0be08735d0bd8f9a85b2c13b3b4b1.jpg\"><\/p>\n<p>Here&#8217;s a picture where you can see all of the layers.<\/p>\n<p><img decoding=\"async\" src=\"http:\/\/andihays.net\/wordpress\/\/HLIC\/05b1bbb00cc190c459228857ecd4044d.jpg\"><\/p>\n<p>Now you put the molds back into the fridge to, you guessed it, harden. <\/p>\n<p>After they are good and solid, you&#8217;re ready to take them out of their molds. They should slide out fairly easily since you put the cooking spray into the molds to help with the sticking. I ended up using my fingers a bit to get them out. But they came out without too much effort. The ones in the ice cube trays were a little harder to get out because it was a smaller space.<\/p>\n<p><img decoding=\"async\" src=\"http:\/\/andihays.net\/wordpress\/\/HLIC\/bb399db2499ccddc0aa46e6d2daaf478.jpg\"><\/p>\n<p><img decoding=\"async\" src=\"http:\/\/andihays.net\/wordpress\/\/HLIC\/74a40ac271fbbf6aacdc080978543f88.jpg\"><\/p>\n<p><img decoding=\"async\" src=\"http:\/\/andihays.net\/wordpress\/\/HLIC\/c290b1fdfd9d570c269708cbefbd5444.jpg\"><\/p>\n<p><img decoding=\"async\" src=\"http:\/\/andihays.net\/wordpress\/\/HLIC\/c4a68eede850527c13b17a0fde358c4c.jpg\"><\/p>\n<p><img decoding=\"async\" src=\"http:\/\/andihays.net\/wordpress\/\/HLIC\/acbf41cf3e8a8ed46ecfe8e2a90675a2.jpg\"><\/p>\n<p>I decided to cut the tall, skinny ones in half to make them easier to eat, and I cut the ones from the cupcake pan into quarters for the same reason. Then I added them to a try (with a lid for easier portability). <\/p>\n<p><img decoding=\"async\" src=\"http:\/\/andihays.net\/wordpress\/\/HLIC\/0d70250cc2511ad78b75fd1ffa4e939b.jpg\"><\/p>\n<p>Pretty cool, huh? They look like candy corn! <\/p>\n<p>Now, because I loved this idea so much, I made them for my shower back in November. I did them in green, pink and blue which were the colors my friends told me were the shower colors. I think they turned out pretty cute! I used strawberry jello for these. <\/p>\n<p><img decoding=\"async\" src=\"http:\/\/andihays.net\/wordpress\/\/HLIC\/a9e46c44bf835f12726a264528af7e79.jpg\"><\/p>\n<p>So there&#8217;s proof you can do them in any color you want. All I did differently, was make sure I put the condensed milk in two containers after mixing in the gelatine so I could color one blue and one green. <\/p>\n<p>I hope you make some of these. They&#8217;ll be a big hit for a kids party or a gathering. And if you do make some, please send me pictures! I would love to see what you made!<\/p>\n<p><img decoding=\"async\" src=\"http:\/\/andihays.net\/drupal\/files\/images\/Andi_2_0.png\"><\/p>\n","protected":false},"excerpt":{"rendered":null,"protected":false},"author":1,"featured_media":0,"comment_status":"open","ping_status":"closed","sticky":false,"template":"","format":"standard","meta":{"_monsterinsights_skip_tracking":false},"categories":[6],"tags":[],"rttpg_featured_image_url":null,"rttpg_author":{"display_name":"Andi","author_link":"http:\/\/andihays.net\/wordpress\/author\/andi\/"},"rttpg_comment":0,"rttpg_category":"<a href=\"http:\/\/andihays.net\/wordpress\/category\/food\/\" rel=\"category tag\">Food<\/a>","rttpg_excerpt":"There are two things you should know about this post before you read it: I should have posted this back in October when I made these for Halloween. This is going to be long! I came across this recipe on a really cool website called Jelly Shot Test Kitchen. And I was really excited to...","_links":{"self":[{"href":"http:\/\/andihays.net\/wordpress\/wp-json\/wp\/v2\/posts\/1449"}],"collection":[{"href":"http:\/\/andihays.net\/wordpress\/wp-json\/wp\/v2\/posts"}],"about":[{"href":"http:\/\/andihays.net\/wordpress\/wp-json\/wp\/v2\/types\/post"}],"author":[{"embeddable":true,"href":"http:\/\/andihays.net\/wordpress\/wp-json\/wp\/v2\/users\/1"}],"replies":[{"embeddable":true,"href":"http:\/\/andihays.net\/wordpress\/wp-json\/wp\/v2\/comments?post=1449"}],"version-history":[{"count":0,"href":"http:\/\/andihays.net\/wordpress\/wp-json\/wp\/v2\/posts\/1449\/revisions"}],"wp:attachment":[{"href":"http:\/\/andihays.net\/wordpress\/wp-json\/wp\/v2\/media?parent=1449"}],"wp:term":[{"taxonomy":"category","embeddable":true,"href":"http:\/\/andihays.net\/wordpress\/wp-json\/wp\/v2\/categories?post=1449"},{"taxonomy":"post_tag","embeddable":true,"href":"http:\/\/andihays.net\/wordpress\/wp-json\/wp\/v2\/tags?post=1449"}],"curies":[{"name":"wp","href":"https:\/\/api.w.org\/{rel}","templated":true}]}}