Skip to content

ANDI HAYS

— my little corner of randomness —

Menu
  • Here’s What I Have to Say
  • Tidbits About Me
  • Sites I’ve Helped With
  • Disclaimer
Menu

Category: Food

Cheesy Chipotle Chicken Enchiladas

Posted on February 4, 2011 by Andi

I know I have been posting a lot of food posts lately, but I have a lot of them stored up! So you’re going to be getting food posts a lot. At least until I catch up or something more exciting than food happens for me to write about!

This is obviously another Let’s Dish meal. I made this the other night for dinner. And I am sad that this was the last of these meals we had in the freezer!

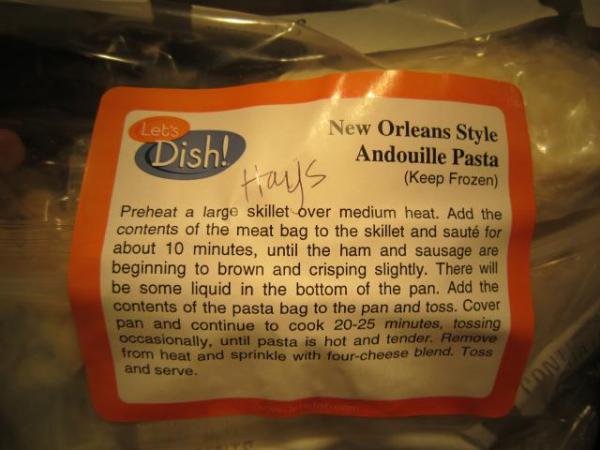
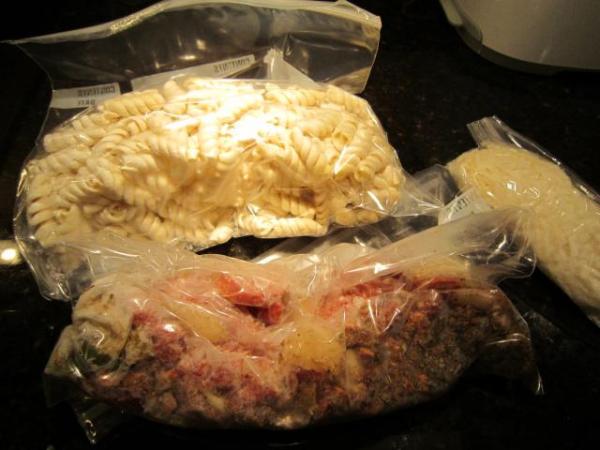
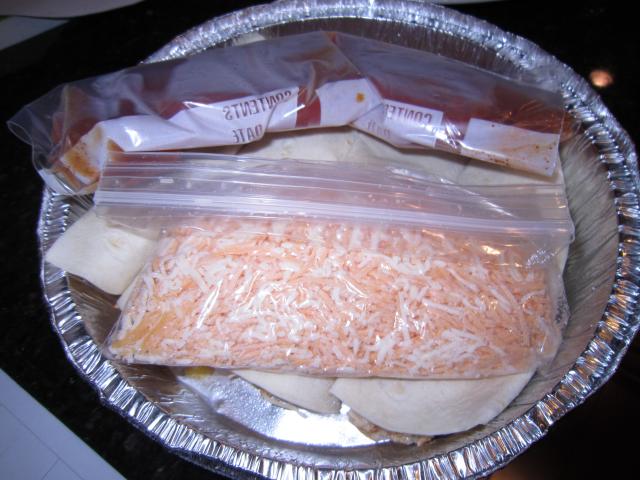
This is how all the stuff comes out of the freezer after packaging it at the store.

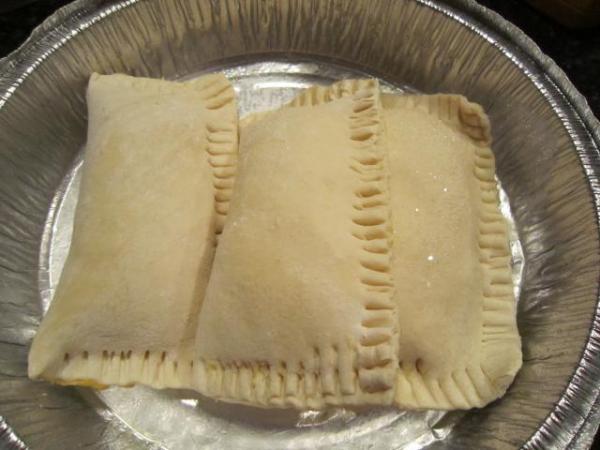
You take out the cheese and salsa and you’re left with the enchiladas.

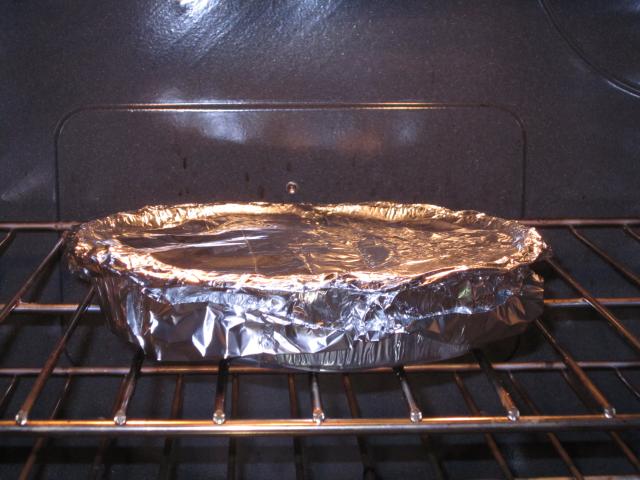
Cover this with tin foil and then stick it in the oven.

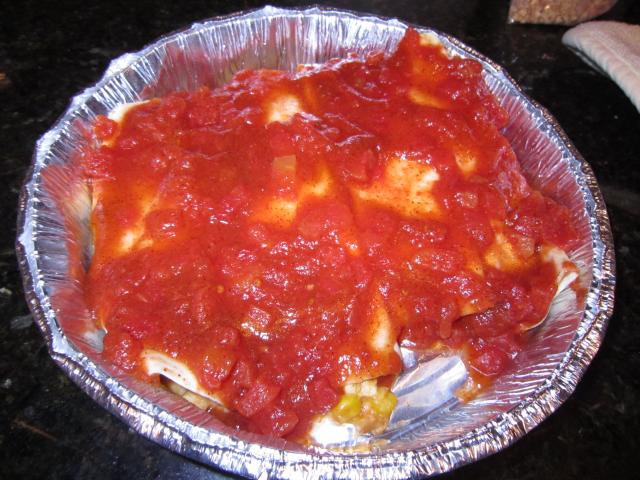
After it’s cooked for a while, you take it out of the oven and then top it with the salsa (after you had thawed it out). Then you top it with cheese and stick it back in the oven.

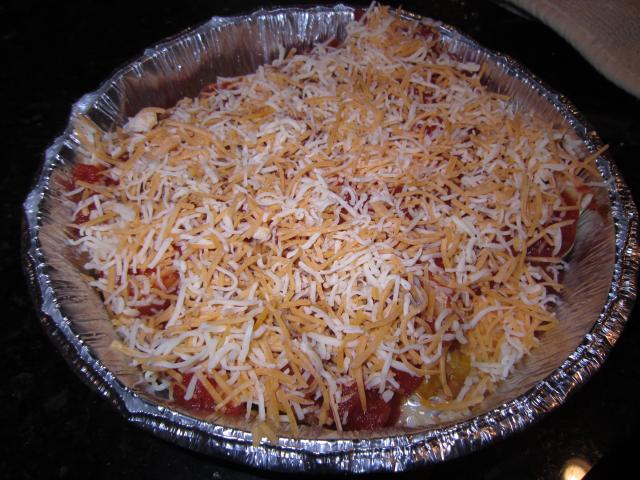
After it’s been baking for a while, when you take it out of the oven it will be all melty and delicious looking.

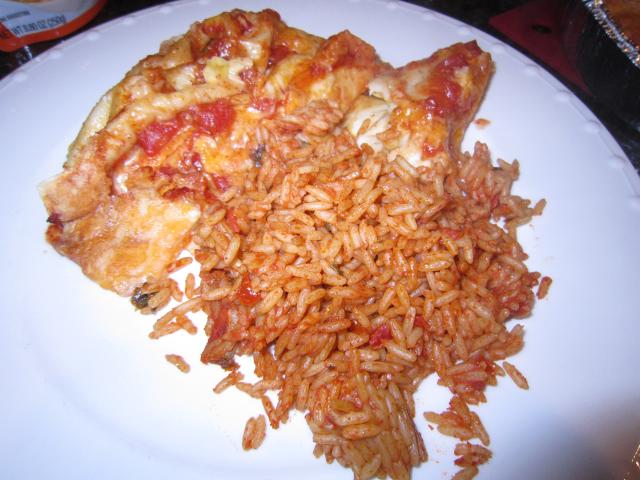
Then you serve it up. I made some Spanish rice to go with it. Rice was the only thing this meal was lacking. There wasn’t any in the enchiladas and I felt like it needed a little something.

I love this meal and I am hoping that the next time I go to Let’s Dish, they have this meal again!

Do you have an enchilada recipe you really like? Or a go-to Mexican meal you couldn’t live without?

Happy eating!

Read more

Peppermint Bark

Posted on February 3, 2011 by Andi

Since I recently posted my recipe for S’mores Bark, I thought I would post my peppermint bark recipe, too. You start out the same as the other bark.

What you’ll need:

  • Bag of milk chocolate chips
  • Bag of white chocolate chips
  • Candy canes
  • Tin foil
  • Baking pan
  • Rolling pin, meat mallet, hammer or something else for smashing the candy canes

First, line a baking pan with tin foil.

IMG_0472

Then, put the milk chocolate chips in a microwave safe bowl.

IMG_0473

You’re going to microwave the chocolate until it melts, but while it’s melting, you can start unwrapping the candy canes.

Microwave the chips in 30 second intervals, stirring after each interval until it is melted.

IMG_0475

IMG_0476

After the chocolate is melted, spread it out on the tin foil in an even layer.

IMG_0477

IMG_0478

Now put this into the fridge or freezer to harden the chocolate a bit. It makes it easier for the next step.

While this is in the fridge/freezer, unwrap the candy canes and put them into a freezer bag. I tend to break them into smaller pieces as I am putting them into the bag.

Then I lay the bag on a kitchen towel to try to prevent the candy canes from breaking through the plastic.

Then I whack the heck out of them with a rolling pin or a meat mallet. This is quite refreshing if you are stressed. Smile I break them into pretty small pieces. Just think about how big you would want them if you were biting into them. Smaller is better, but you still want some chunks. It’s just prettier that way.

Next, put the white chocolate chips in a microwave safe bowl and microwave in 30 second intervals, stirring after each interval, until it is melted.

IMG_0474

IMG_0483

IMG_0485

Now, get your pan out of the fridge/freezer and pour the white chocolate over the milk chocolate. Do your best to spread it all over. The white chocolate will melt the milk chocolate a little and make them blend together. Doing this helps keep them slightly more separated, although, there will be some blending.

Then sprinkle with the candy canes.

Now take another piece of tin foil and place it over the top and press evenly on the whole pan. This sets the candy canes inside the chocolate.

Then put this back into the fridge/freezer to harden. After is has hardened, break it into pieces and ENJOY!

There you have it! Simple as could be! This is great to put into tins or clear gift bags and give them to friends or family for Christmas.

Read more

Citrus Grilled Tilapia With Rice

Posted on February 1, 2011 by Andi

This was a Let’s Dish meal that I was a little skeptical about. I would not consider myself even remotely to be a fish person. I like catching them, but I have never really liked the taste. Unless it doesn’t taste like fish. And I can eat every fish bite with a starch. This meal was way better than I thought it would be. It was filled with flavor and I am actually excited to make the other one of these meals in the near future.

Here are the contents:

First you thaw out the tilapia. Then place it on a baking pan.

You bake this in the oven. While I was baking it, I made the rice.

When the fish is done, remove it and smell the deliciousness.

Then serve it with the rice and in my case, corn.

This was so flavorful. It was filled with citrus flavor and the fish just fell apart. And I was pleased that tilapia wasn’t a very “fishy” fish. So, I am definitely putting the other meal I have of this on my menu for the near future!

Read more

S’mores Bark

Posted on January 31, 2011January 31, 2011 by Andi

Right after Christmas, my friend at work picked up some S’mores Bark at Target.  We talked about making some and I knew I had to give it a try. So, I made it my mission to make some. I was too tired after work, so I woke up early one morning and made it before work. And it was a HUGE hit and got rave reviews!

There are tons of recipes you can get online, but this is how I made mine.

What you’ll need:

  • Bag of milk chocolate chips
  • Bag of white chocolate chips
  • Graham crackers
  • Mini marshmallows
  • Tin foil
  • Baking pan

First, line a baking pan with tin foil.

IMG_0472

Then, put the milk chocolate chips in a microwave safe bowl.

IMG_0473

You’re going to microwave the chocolate until it melts, but while it’s melting, you should break up 2-3 graham crackers so they are ready when your chocolate is melted.

Microwave the chips in 30 second intervals, stirring after each interval until it is melted.

IMG_0475

IMG_0476

After the chocolate is melted, spread it out on the tin foil in an even layer.

IMG_0477

IMG_0478

Then sprinkle the graham crackers on the chocolate and press the crackers into the chocolate to set them in.

Now put this into the fridge or freezer to harden the chocolate a bit. It makes it easier for the next step.

Next, put the white chocolate chips in a microwave safe bowl and microwave in 30 second intervals, stirring after each interval, until it is melted.

And while this is melting, smash up a graham cracker or two for sprinkling over the top at the end.

IMG_0474

IMG_0483

IMG_0485

Now, get your pan out of the fridge/freezer and pour the white chocolate over the milk chocolate and graham crackers. Do your best to spread it all over. The white chocolate will melt the milk chocolate a little and make them blend together. Doing this helps keep them slightly more separated, although, there will be some blending.

Then sprinkle on as many marshmallows as you like. I tend to like marshmallows and added a bunch of them!

And then sprinkle the graham cracker crumbs you made over the top of this.

Finally, add another piece of tin foil to the top and press everything down. This helps to set everything into the chocolate. After doing this, put back into the fridge or freezer until completely hardened.

IMG_0489

After it has hardened, break apart into pieces for serving.

And ENJOY. That’s it. It may seem like this is complicated, but I assure you, it’s SO very simple. I also brought this to a gathering the other night and our friends LOVED it! I highly recommend trying this for your next gathering.

Read more

new orleans style andoullie pasta

Posted on January 3, 2011 by Andi

This was a meal from Let's Dish. I knew Chuck was going to love this meal (with all the different meats and the spicy flavor), but I was unsure how I would like it.

Here are the ingredients:

First you cook the bag with the meats and seasonings.

After cooking the meat, you add the pasta. This pasta was already cooked, so you could just add it right to the meat mixture. I added a little bit of water to mixture after adding the pasta to make everything mix together a little better.

That's pretty much it. 🙂 Well, for me. I took out some food for me to eat and it looked pretty tasty.

For Chuck, I added the cheese.

I'm not one for cheese, but if you like cheese, I am sure this looks pretty darn tasty to you!

I had high hopes for the meal, but I just didn't really care for the flavors in this meal. Chuck, on the other hand, loved it. So I guess it was half a hit! 🙂 We still have one more of these meals to try, but it will probably wait until the others are gone since I won't be very motivated to cook it again. Or I should just make it for Chuck some night and he can have lots of leftovers for work. 🙂

Have you made any meals recently you thought would be really tasty and turned out not living up to your expectations?

Read more

get in the bowl

Posted on January 1, 2011 by Andi

I have seen this commercial a couple times today and I needed to share it. If you haven't seen this commercial, be prepared to laugh! I think this commercial is hilarious!

Enjoy!

M&M Commercial

Read more

cookies

Posted on November 27, 2010 by Andi

Let me start this by saying I am not a baker. I would love to be a baker, but I have a tendency to want cookies and baked goods more well-done than most people and I don't really like cookies, cake, frosting, or most other goodies that you bake.

Now that I am pregnant, though, bring on the cookies. Seriously….yum!

So I made some. These were sugar cookies out of a bag. (Come on, you didn't think I was going to start baking and do soemthing crazy like make them from scratch did you???)

Here's the whole decorated batch:

Here they are a little closer up:

They were really tasty. I made sure to give some to the neighbors so we wouldn't eat them all. I am definitely making these again! And I was so proud of myself for decorating them by filling a plastic baggie with the frosting and going nuts. They weren't perfect, but I was proud either way. 🙂

Read more

cheesy beef and rice burritos

Posted on November 23, 2010 by Andi

Guess what….I made a Let's Dish meal. This one was burritos. I forgot these were in the freezer, but I am quite glad I found them in there!

Here are all the ingredients:

First, make the rice.

I like to thaw out my salsa (and other ingredients when necessary) by putting hot water in the sink and letting the salsa sit in there to thaw. This doesn't end up making it hot, but more room temperature and much easier to use for burritos.

Then you cook the meat. I can't remember all the flavors we put in the meat bag to make this, but I can tell you that it was tasty!

Then you get the rest of your ingredients ready to eat. (Apparently I made this longer ago than I thought since there are still Halloween decorations up.)

And here is the meat and rice all ready to eat.

And finally, the burritos (which are more like tacos that hardly close by the time I fill them up).

Now this makes make hungry!

Read more

kung pao chicken pasta

Posted on November 14, 2010 by Andi

I haven't posted a Let's Dish meal in a while, so I thought I was due.

Here's all the plastic sacks we had for this meal.

First cook the chicken and the pasta.

Next, remove the chicken and cook the sauce.

Then you add the chicken back into the sauce.

Now, drain the noodles and add them to the chicken and sauce.

Finally…EAT!

This was so tasty. We made it spicy and it was so delicious! I should really make this for dinner again soon. I even took some to work for lunch the next day!

Read more

chicken cordon bleu turnovers

Posted on November 3, 2010 by Andi

You'll never guess…this is another Let's Dish meal. This was not what I expected when I made this. I was picturing more of a Hot Pocket of sorts. But I was in for a pleasant, tasty surprise!

This is what they looked like when I opened them from the packaging they were in.

The turnovers get placed on a cookie sheet that has been sprayed with cooking spray.

Then you bake it and it turns out like this:

I was so surprised when I looked in the oven and they had puffed up like balloons! The funny thing is how carefully Chuck and I made sure they were all sealed really well. We had no idea they were going to do THIS when they were cooked! 🙂

They were really tasty and flaky. I was very happy with them. This set of them we ate a couple weeks ago, but we just had the other one the other night for dinner and it was just as tasty! So yet another delicious hit for Let's Dish meals!

Read more

Posts navigation

  • Previous
  • 1
  • …
  • 5
  • 6
  • 7
  • 8
  • 9
  • 10
  • 11
  • …
  • 19
  • Next
Facebook
Twitter
YouTube
Pinterest
LinkedIn
Instagram
GitHub

Instagram

Links

  • MadeByChuck.com
  • My Wish List
  • Our Photo Gallery
  • Wish List – Alex
  • Wish List – Dannie
  • Wish List – Maddie

Categories

Alex Baby Journal Books Crafts Dannie Food GiST Glendalough Lake House Lessons Maddie Parenting Products & Places Randomness Seattle Social Distancing Tech

Archives

Meta

  • Log in
  • Entries feed
  • Comments feed
  • WordPress.org
© 2026 ANDI HAYS | Powered by Superbs Personal Blog theme